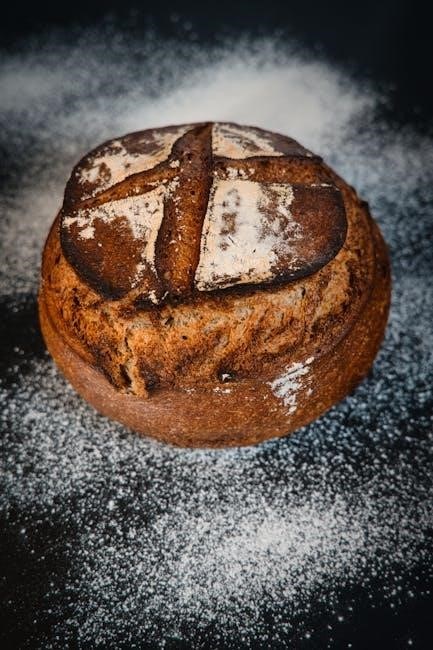
A sourdough starter is a natural mixture of flour and water hosting wild yeast and bacteria, serving as a traditional leavening agent. This living culture is the foundation of sourdough baking, requiring careful creation and maintenance. With printable instructions, anyone can master the process of cultivating and using this essential tool for authentic bread making.
What is a Sourdough Starter?
A sourdough starter is a naturally occurring mixture of flour and water that ferments over time, creating a living culture of wild yeast and lactic acid bacteria. This organic process attracts microorganisms from the environment, making the starter a unique, self-sustaining leavening agent. Unlike commercial yeast, a sourdough starter is cultivated slowly, requiring patience and regular feeding. It is the foundation of sourdough bread, imparting its distinctive tangy flavor and chewy texture. The starter is versatile, usable in various baked goods, and can be stored for long periods with proper care. Its creation and maintenance are simple but require consistency, making it a rewarding project for bakers. With printable guides, anyone can learn to create and manage this essential tool for authentic, homemade sourdough baking.
Importance of a Healthy Sourdough Starter
A healthy sourdough starter is the cornerstone of successful sourdough baking. It ensures consistent fermentation, rise, and the distinctive tangy flavor of sourdough bread. The starter’s balance of wild yeast and bacteria directly impacts the bread’s texture and aroma. A robust, active starter guarantees reliable results, while an unhealthy one can lead to poor rise or off-flavors. Regular feeding and proper care are essential to maintain its vitality. Over time, a well-cared-for starter becomes more resilient and adaptable, making it a long-term companion for bakers. Printable guides often emphasize the importance of monitoring and nurturing the starter to achieve optimal health. By prioritizing its well-being, bakers can unlock the full potential of sourdough, creating bread that is both nourishing and delicious. A healthy starter is not just a tool but a living partner in the baking process.
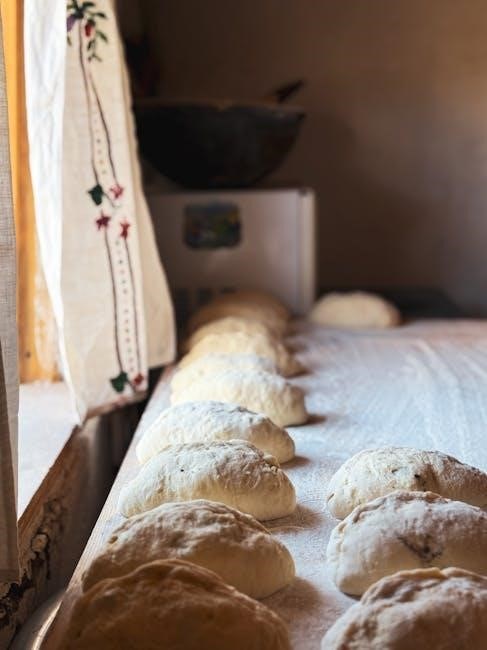
Creating a Sourdough Starter from Scratch
Creating a sourdough starter from scratch involves mixing flour and water to foster wild yeast and bacteria growth. This process requires patience and daily feeding to establish an active culture.
Day 1: Initial Mix of Flour and Water
Begin by mixing equal parts of flour and water in a clean glass container. Use 50% whole wheat or rye flour for better microbial activity. Add 100g of flour and 100g of water, stirring until smooth. Cover the container loosely to allow airflow. Place it in a warm, draft-free spot at room temperature (around 72°F). This initial step kickstarts the fermentation process, attracting wild yeast and bacteria. Let it rest for 24-48 hours before proceeding to the feeding stage. Avoid using metal utensils or containers, as they can inhibit microbial growth. Ensure all tools are clean to prevent contamination. This simple mixture is the foundation of your sourdough journey, setting the stage for a healthy, active starter.
Days 2-7: Daily Feeding and Observation
Starting from Day 2, feed your sourdough starter daily to promote microbial growth. Discard half of the starter and add equal parts of flour and water (1:1:1 ratio). For example, if you have 100g of starter, discard 50g, then add 50g of flour and 50g of water. Mix thoroughly and transfer to a clean container if needed. Observe the starter’s activity—it should become bubbly, frothy, and emit a tangy aroma. If it appears sluggish, ensure it’s in a warm, draft-free environment (around 72°F). By Day 7, the starter should double in size after feeding, indicating it’s ready for baking. Keep a feeding schedule to track progress, and be patient as activity may vary depending on flour type and ambient conditions. Consistency is key to developing a robust, active starter.
Signs Your Sourdough Starter is Ready
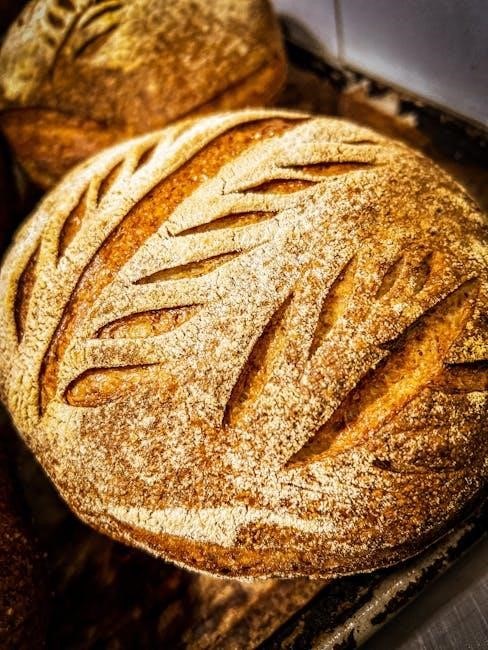
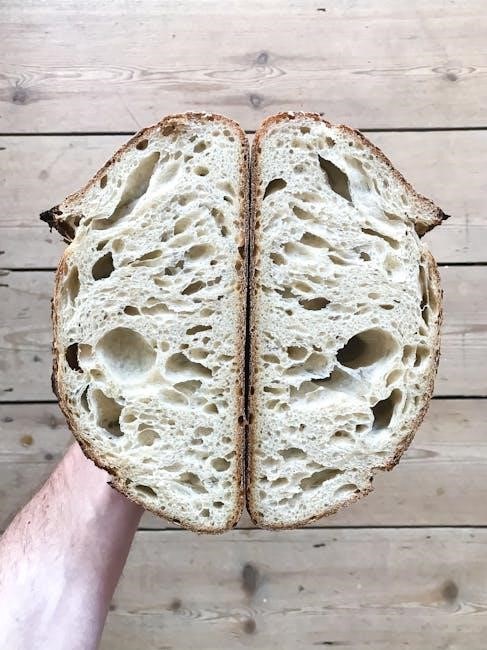
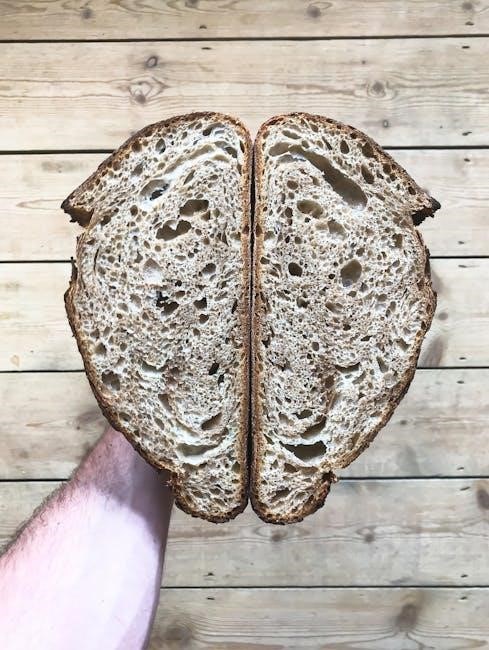
Your sourdough starter is ready when it consistently doubles in size within 4-6 hours after feeding. It should appear lively, with a domed surface, numerous bubbles, and a tangy, slightly sour aroma. The texture will be smooth and frothy, resembling thick pancake batter. If the starter is sluggish or lacks activity, it may need more time or a warmer environment. A fully active starter will also float in water, indicating sufficient carbonation. These signs confirm that the starter is healthy, balanced, and ready to use in baking recipes. Proper activity is crucial for leavening bread effectively. Once these signs are evident, your starter is prepared for recipes or long-term storage. Always verify readiness before baking to ensure the best results.
Feeding and Maintaining Your Sourdough Starter
Regular feeding is essential for a healthy sourdough starter. Use a balanced ratio of flour and water to nourish it, ensuring it remains active and ready for baking.
Understanding the Feeding Cycle
The feeding cycle is crucial for maintaining a healthy sourdough starter. It involves discarding a portion of the starter and adding fresh flour and water to replenish it. This process helps balance the yeast and bacteria, ensuring the starter remains active and robust. Typically, feed your starter once daily, using a 1:1:1 ratio of starter to flour to water by weight. For example, if you have 50 grams of starter, add 50 grams of flour and 50 grams of water. This routine keeps the starter vibrant and ready for baking. Printable feeding schedules can guide you through this process, ensuring consistency and success in sourdough cultivation. Regular feeding prevents the starter from becoming too hungry or over-proofed, maintaining its optimal condition for bread making.
Discarding and Refreshing the Starter
Discarding a portion of your sourdough starter is essential to maintaining its health and balance. Before each feeding, remove and discard half of the starter to prevent it from becoming too dense or acidic. This step ensures the remaining starter has enough nutrients to thrive. After discarding, refresh the starter by adding equal parts of flour and water (1:1:1 ratio). For example, if you have 50 grams of starter, add 50 grams of flour and 50 grams of water. This process replenishes the starter’s food supply and keeps it active. Printable guides often include discard and refresh schedules to help you stay consistent. Remember, discarded starter can be used in other recipes, reducing waste and adding sourdough flavor to pancakes, waffles, or bread. Regular discarding and refreshing ensure your starter remains vigorous and ready for baking. This routine is vital for long-term maintenance and baking success.
Storage Options: Room Temperature vs. Refrigeration
Proper storage is crucial for maintaining your sourdough starter’s health. For active use, such as daily baking, keep the starter at room temperature (around 72°F to 75°F) and feed it twice a day. This ensures it remains lively and ready for recipes. If you bake less frequently, refrigeration is ideal. A refrigerated starter requires feeding once a week to stay healthy. Before using a chilled starter, allow it to come to room temperature and feed it to activate it. Printable guides often include storage tips to help you manage your starter effectively. Whether you choose room temperature or refrigeration, consistency in feeding and observation is key to maintaining a thriving sourdough starter for future baking endeavors.
Using Your Sourdough Starter in Baking
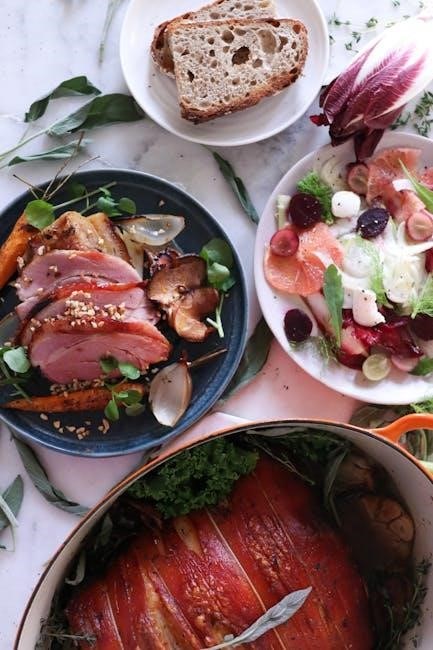
Your sourdough starter is a versatile ingredient for bread, pancakes, waffles, and more. Printable guides offer recipes and tips to seamlessly incorporate it into your baking, ensuring delicious results with minimal effort and maximum flavor.
Converting Recipes to Use Sourdough Starter
Converting traditional recipes to use a sourdough starter requires adjusting ratios of flour, water, and yeast. Since sourdough starters act as natural leavening agents, recipes may need less commercial yeast or none at all. Start by replacing yeast with an equal amount of active sourdough starter, then adjust flour and water proportions to maintain the right consistency. Allow for longer fermentation times due to the slower action of wild yeast. Printable guides often include conversion charts and tips for adapting recipes like pancakes, waffles, or bread. For example, using sourdough discard in recipes like pancakes or muffins adds flavor without waste. Always test small batches to ensure the best results, as the starter’s potency can vary. With practice, you’ll master the art of integrating your sourdough starter into a variety of dishes.
Measuring the Starter for Recipes
Measuring sourdough starter accurately is crucial for achieving the right texture and rise in baked goods. Always use an active, ripe starter, as it will have the most consistent behavior in recipes. For best results, measure the starter by weight using a digital scale, as volume measurements can vary depending on how airy or dense the starter is. A general rule is to use a 1:1:1 ratio of starter to flour to water when maintaining or feeding it, but this may vary based on the recipe. Printable guides often include conversion charts to help adapt measurements for different recipes. When using discard, ensure it’s at room temperature and well-mixed before incorporating it into your dough. Accurate measurement ensures your sourdough creations turn out light, flavorful, and perfectly textured every time.
Storing the Starter for Future Use
Proper storage ensures your sourdough starter remains healthy and ready for future baking. For frequent use, keep it at room temperature in a glass or ceramic container with a loose lid. Feed it daily to maintain activity. If baking less often, store it in the refrigerator, feeding it once a week to slow fermentation. Before storing, always feed the starter to replenish its energy reserves. For long-term storage, you can also dry the starter on parchment paper or mix it with flour to create a powder, then store it in an airtight container. Printable storage cards provide handy reminders for feeding schedules and care tips, ensuring your starter stays vibrant and ready whenever you need it. Proper storage extends the life of your sourdough starter, making it a reliable companion for years of baking.
Troubleshooting Common Issues
- Slow Activity: Ensure warm temperatures and proper feeding. A sluggish starter may need more frequent feeding or a fresh flour boost.
- Excessive Hooch: Excess liquid indicates over-fermentation. Pour off hooch, feed the starter, and store it in the refrigerator to slow fermentation.
- Mold Growth: Discard the starter if mold appears, as it cannot be salvaged. Start fresh with a clean environment and ingredients.
- Over-Proofing: Watch for signs of collapse. Adjust feeding schedules and storage conditions to maintain a healthy, balanced starter.

Slow or No Activity in the Starter
If your sourdough starter shows little to no activity, it may be due to insufficient feeding, incorrect temperatures, or poor flour quality. Ensure your starter is kept in a warm environment (around 75°F to 78°F) to promote fermentation. Check feeding schedules and verify you’re using the right ratio of flour and water. If the starter is too dry or over-diluted, adjust the consistency. Sometimes, a slower starter can be revived by increasing feeding frequency or switching to a higher-protein flour like whole wheat or rye. Avoid over-dilution, as this can weaken the starter’s structure. Be patient, as natural fermentation processes can vary. If activity persists, consider starting fresh with a new batch.
Excessive Hooch or Too Runny a Starter
Excessive hooch or a too-runny starter indicates over-fermentation or improper feeding. To address this, discard half of the starter and feed it with a slightly higher proportion of flour to water. For example, if you normally use a 1:1 ratio, try 1:0.8 or 1:0.9 to thicken the consistency. Ensure you’re using the right type of flour, as whole wheat or rye can help absorb excess moisture. If the starter is too liquid, it may be receiving too much water or not enough flour during feedings. Regularly monitoring the starter’s texture and adjusting the feeding schedule can prevent this issue. Additionally, storing the starter in the refrigerator can slow down fermentation, reducing the likelihood of excessive hooch formation. Always observe and adjust based on your starter’s behavior to maintain a healthy, balanced consistency.
Mold Growth on the Starter
Mold growth on your sourdough starter is a sign of neglect or improper storage. It typically appears as visible patches, discoloration, or an off smell. To address this, immediately discard the affected starter and thoroughly sanitize the container with hot water and vinegar. Restart with a fresh mixture of flour and water, ensuring all tools and surfaces are clean. Prevent mold by maintaining a consistent feeding schedule, storing the starter in a cool, dry place, and using the right proportions of flour and water. Regularly inspect your starter, and if you notice any mold, act promptly to avoid contamination. A healthy starter requires attention and proper care to thrive without developing mold.
Over-Proofing and How to Prevent It
Over-proofing occurs when a sourdough starter is left to ferment too long, causing it to collapse or become overly bubbly and sour. This can happen if the starter is fed too frequently or stored at too warm a temperature. To prevent over-proofing, monitor the starter’s activity closely and adjust feeding schedules based on its behavior. A healthy starter should double in size within 4-6 hours after feeding. If it doubles more quickly, it may be over-proofing. Store the starter in a cooler environment or feed it less frequently to slow fermentation. Regularly inspecting the starter and maintaining a consistent routine will help prevent this issue, ensuring your sourdough remains balanced and active for baking.
Advanced Techniques for Sourdough Enthusiasts
Explore unique flavor profiles by experimenting with different flours and levain starters. Adjust feeding schedules and ratios to tailor your sourdough to specific recipes, enhancing complexity and texture.
Using Different Flours for Unique Flavor Profiles
Experimenting with various flours can elevate your sourdough baking by introducing distinct flavors and textures. Whole wheat flour adds a nutty, earthy note, while rye flour contributes a tangy, slightly sour taste. Spelt flour, an ancient grain, offers a sweet and nutty profile. When incorporating different flours, start by substituting a portion of your usual flour during the feeding process. For example, replace 25-50% of bread flour with whole wheat or rye to create a more complex starter. Adjust the feeding ratio if needed, as denser flours like rye may require more water. Printable guides often include specific ratios for blending flours, ensuring the right balance for optimal fermentation. This technique allows bakers to tailor their sourdough to specific recipes, enhancing the overall baking experience.
Creating a Levain Starter for Variations
A levain starter is a versatile variation of sourdough, offering unique flavor profiles. To create one, begin with a small portion of your active sourdough starter. Mix it with equal parts of flour and water, using a specific type of flour like whole wheat, rye, or spelt for distinct characteristics. Feed the levain twice daily, maintaining a 1:1:1 ratio of starter to flour to water by weight. This process enhances its activity and imparts a lighter, more delicate quality compared to traditional sourdough. Printable guides often provide detailed schedules for feeding and storing levain starters. Regular maintenance ensures the levain remains healthy and ready for use in various bread recipes, allowing bakers to explore diverse tastes and textures in their creations.
Printable Resources for Sourdough Success
Download free printable resources, including instruction cards, feeding schedules, and care guides. These tools help organize your sourdough journey, ensuring consistent results and easy maintenance. Use the QR code for quick recipe access and explore customizable tags for tracking your starter’s progress. These resources are designed to simplify the process and keep you inspired for future bakes.
Printable Sourdough Starter Instruction Cards
These printable instruction cards provide a step-by-step guide to creating and maintaining a sourdough starter. Designed to be concise and easy to follow, they include daily feeding schedules, measurement guidelines, and storage tips. Perfect for beginners, the cards outline the process from Day 1 through Day 7, ensuring your starter develops properly. They also include space for notes, allowing you to track your progress and adjust as needed. Made to be giftable, these cards are ideal for sharing with friends or keeping in your kitchen for quick reference. With a QR code linking to a detailed eBook, you’ll have all the resources you need to master sourdough baking. These cards simplify the process, making it easy to keep your starter healthy and active for future recipes.
Free Printable Feeding Schedule
A free printable feeding schedule is an essential tool for maintaining your sourdough starter. This schedule outlines the daily feeding routine, ensuring your starter remains healthy and active. It includes specific instructions for discarding and refreshing the starter, with clear timelines for feeding cycles. Whether you’re keeping your starter at room temperature or refrigerating it, the schedule adapts to your needs. Detailed feeding ratios, such as the 1:1:1 formula, are provided to simplify the process. The schedule also includes tips for recognizing signs of readiness and adjusting feedings based on activity levels. Perfect for both beginners and experienced bakers, this printable guide helps you stay organized and ensures your starter is always ready for baking. Many schedules include space for notes, allowing you to track progress and personalize the feeding process. A QR code is often included for easy access to additional resources and recipes.
Printable Sourdough Care and Maintenance Cards
Printable sourdough care and maintenance cards provide a convenient way to track and manage your starter’s health. These cards include detailed feeding schedules, storage tips, and signs of a thriving starter. They often feature a QR code linking to additional resources, such as recipes or troubleshooting guides. The cards are designed to be kept near your starter, serving as a quick reference for daily care. They also include space for notes, allowing you to record observations and adjustments. Whether you’re storing your starter at room temperature or in the refrigerator, these cards ensure consistency and readability. By following the guidelines on the cards, you can maintain a healthy, active starter and achieve consistent baking results. They are perfect for both beginners and experienced bakers, offering a practical tool for sourdough success.
QR Code for Digital Access to Recipes
A QR code for digital access to recipes offers a seamless way to explore sourdough baking. These codes are often included in printable instruction sets, linking users to comprehensive guides, video tutorials, and exclusive recipes. By scanning the QR code, bakers can instantly access a library of resources, including step-by-step instructions for creating and maintaining a sourdough starter. This feature is particularly useful for beginners, as it provides easy navigation to troubleshooting tips and advanced techniques. Many QR codes connect to eBooks or downloadable PDFs, ensuring that all the information needed for sourdough success is just a scan away. This modern approach to traditional baking makes learning and adapting recipes more convenient than ever, keeping the process organized and enjoyable for bakers of all skill levels. It’s a thoughtful addition to any sourdough starter kit or guide.
Mastering a sourdough starter opens doors to endless baking possibilities. With these printable instructions, you’re ready to bake confidently. Explore recipes, share your journey, and keep experimenting—happy baking!
Final Tips for Sourdough Baking
Consistency and patience are key to mastering sourdough baking. Always maintain a healthy starter by following a regular feeding schedule. Experiment with different flours to enhance flavor profiles.
- Store your starter in the refrigerator for less frequent use, feeding it once a week.
- Use discard in other recipes like pancakes, waffles, or bread to minimize waste.
- Keep a printable feeding schedule handy for tracking progress and staying organized.
With practice, your sourdough starter will become a reliable companion in the kitchen, offering endless possibilities for delicious, homemade bread.
Additional Resources for Further Learning
For those eager to deepen their sourdough knowledge, numerous resources are available online. Printable guides, detailed tutorials, and expert blogs offer comprehensive insights.
- The Sourdough Journey provides in-depth guides and recipes.
- Sourdough International offers courses and expert advice.
- King Arthur Flour shares tips, recipes, and troubleshooting.
Books like “Sourdough” by Casper Andre Lugg and online communities also offer valuable knowledge. These resources ensure continuous learning and improvement in sourdough baking.